A SLA (Service Level Agreement) policy describes a standard of performance for your support team. An example policy might be "all tickets must be replied to or closed within 6 hours." When this policy is exceeded, Helpy executes an escalation, or a set of actions that could reassign the ticket, alert certain team members, and more.
In this section, you will learn about setting up SLA Policies to help ensure that your customer inquiries do not get missed. Specifically, you will learn about:
- Creating a New Policy
- Creating different policies for different teams or customer
- Escalation Actions
- Editing an Existing Policy
- Responding to SLA Violations
Creating a New Policy

You probably have rules or guidelines for your team for how long a customer should have to wait for a response, how long it should take to resolve or close a customer ticket, and so forth. Helpy allows you to enforce these guidelines with SLA Policies.
These rules will watch your tickets to make sure you are following your guidelines. If you exceed the guidelines, Helpy will create an "escalation" to bring your attention to the ticket(s) which are in a service "violation" state.
To create policies, first head to the SLA settings panel by going to settings > SLA Policies. Here you will see a summary of the SLA policies in effect for your account. Click the button to "add a new SLA policy" and complete the following:

Name: Give your policy a short descriptive name like "Should respond within 2 hours of last message received.
Policy: Choose the type of policy you are creating. There are two options- the length of time resolution of the ticket should not exceed, and the maximum length of time a customer should have to wait for a response.
Description: Use the description to provide more context around your policy, and what escalation actions it will execute if violated.
Time: Add the length of time after the previous response or ticket creation before a violation occurs. Make sure you specify both the number (2) and units (hours).
Restrict to Groups: Select team groups to limit this SLA to only certain team groups. You can use this to create different policies for support, billing and other teams in your organization.
Active: Normally this will be on. You can turn it off using the switch.
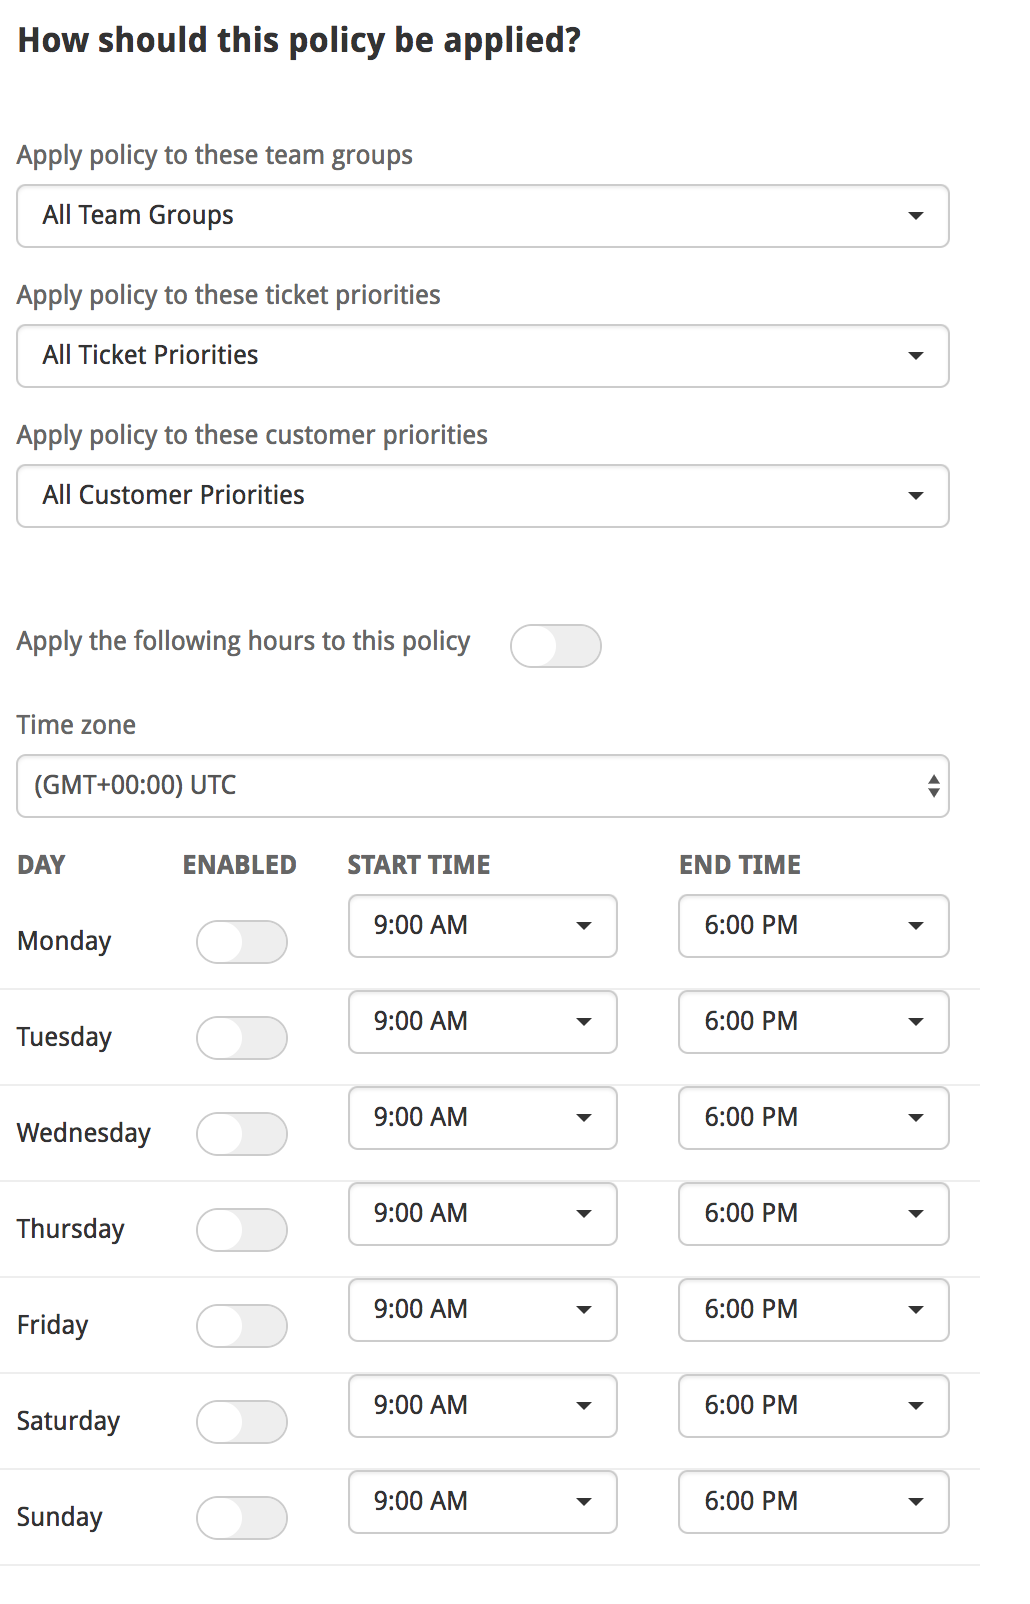
Determine which tickets the Policy will apply to
By default, SLA policies affect all tickets. You can change this behavior by specifying a set of ticket attributes that the SLA should apply to:

Team Groups: Select one or more team groups that a ticket must be associated with in order for the policy to apply. For example, set this to to "billing" to only apply the SLA to billing inquiries.
Ticket Priorities: Select one or more ticket priorities that this SLA will apply to. For example, set this to "Very High" to apply the SLA to tickets marked as very high priority.
Customer Priorities: Select one or more customer priorities for the SLA to apply. For example, set this to VIP to only apply the SLA to tickets created by VIP customers.
SLA Hours: Your business may not run 24/7 and it may not make sense to count off hours against your SLA. In other words, if you promise to respond within 8 hours, you may prefer that mean 8 business hours, rather than 8 absolute hours.
In this section, you can turn on hours for each SLA policy. Leaving hours off means that you will not restrict the SLA by hours. If a ticket comes in at 8PM with an 8 hour SLA, the escalation will occur at 4AM.
To configure SLA hours, start by turning on hours for that SLA. Next turn on hours for each day that your SLA should be in effect, as well as hours for each day. Leaving a day turned off means that the hours that day will not be counted against your SLA.
Escalation Actions
When a policy has been exceeded, it is said to be in a state of "violation." When a ticket goes into violation, an escalation action will occur, and a set of changes you have determined will be made to the ticket. In addition, the status of the ticket will be changed to "violation" and it will appear this way in the ticketing UI until you clear it.

Priority: Reassigns the priority of the ticket.
Tags: Add new tags to a ticket
Assign to a team group: Assign or re-assigns the ticket to a specific team group.
Assign to an agent: Assign or re-assigns the ticket to a specific agent.
Notify users: Select agents to notify both (in app) and by email notification.